Appearance
The scene editor
Opening a project shows its newest version, unless the link names another one, in three parts under the toolbar. The address bar always names the open version (?v= and its id) and follows the Version menu, so a reload stays on the version you were editing and a copied link opens that version.
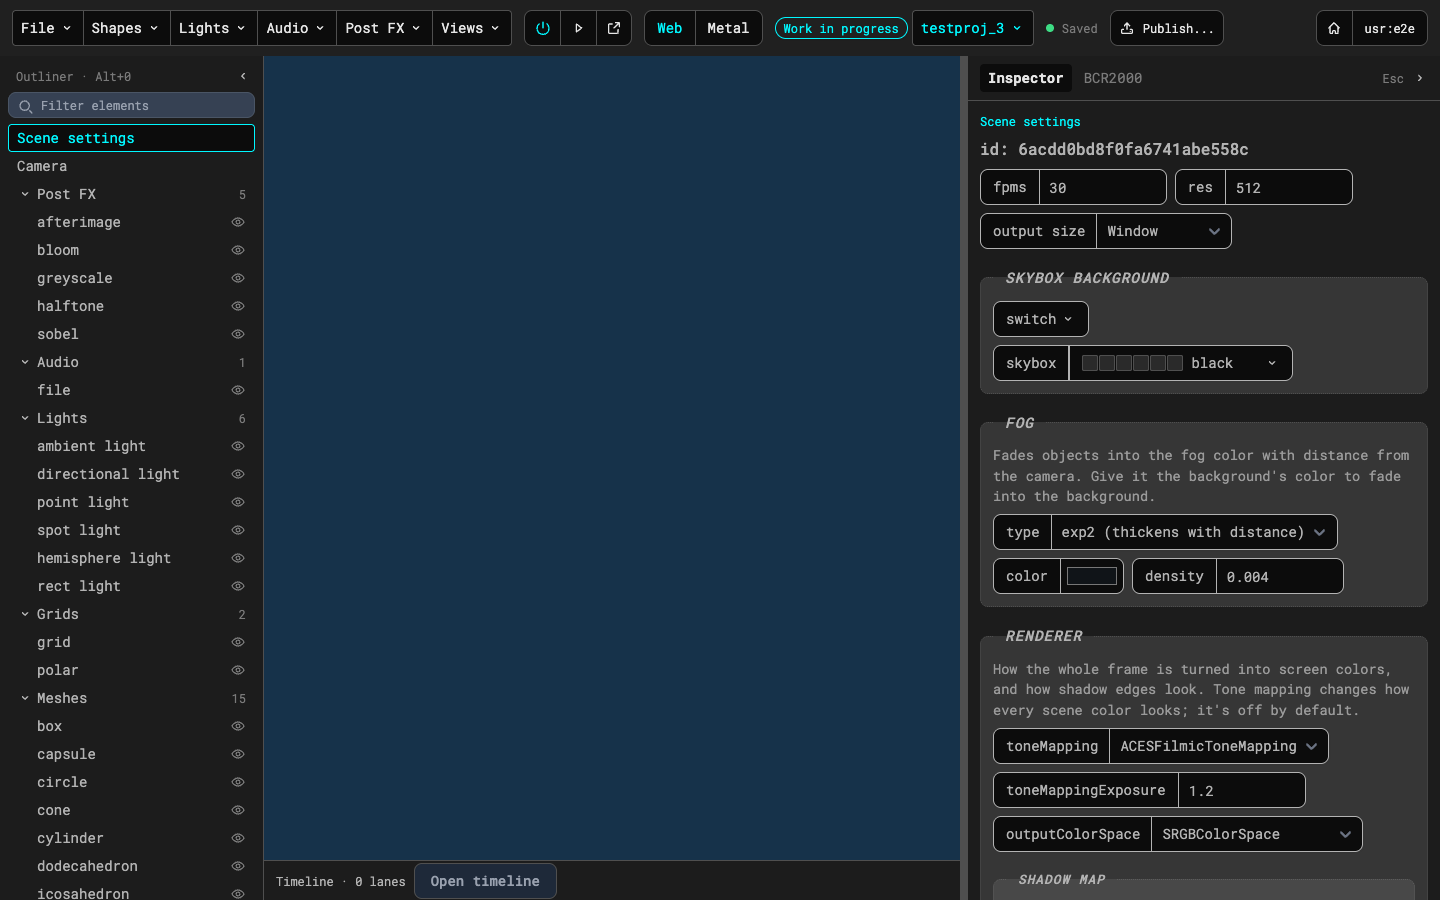
- Toolbar (top): the menus described in Toolbar menus, the preview buttons, the version's status and version menu, the save state, Publish, and your account.
- Outliner (left): the scene as a list. Scene settings and Camera come first, then one group for each kind of element (Post FX, Audio, Lights, Grids, Meshes, OBJs, Instance Geometries) with its count. Click a row to select it. Click a group's chevron to close or open it. Type in Filter elements to show only matching rows. The arrow keys move through the rows, Enter opens a group, Delete asks before it removes the selected element, and Alt+Up or Alt+Down moves the selected Post FX effect up or down one place. You can also drag a Post FX row onto another to move it.
- Preview (middle): where the scene plays once you start the preview, see Preview.
- Inspector (right): the settings of the selected row. The line at its top shows where you are, for example Meshes > box 1, and the element's key.
Each side panel has a chevron in its header that collapses it to a narrow rail; click the rail to bring it back. Drag the inspector's left edge to make it wider or narrower (320 to 720 px); with the edge focused, the left and right arrow keys do the same, and Shift makes the steps bigger. The editor remembers which panels are collapsed and how wide the inspector is, for each user.